笔记本Gentoo系统升级

利用假期把笔记本上的Gentoo系统升级到了最新版,改动的地方记录如下:

  1. urxvt无法运行

    urxvt: unable to load base fontset   
    

    USE参数添加了xft,重新编译安装就好了。

    # USE="truetype perl afterimage iso14755 256-color xft" emerge -av rxvt-unicode
    
  2. Fluxbox菜单里的屏幕截图工具不工作,其实就是ImageMagick的import命令找不到动态库了,重新安装ImageMagick解决。

  3. Slim登录界面,又提示输入用户名了。解决方法:修改/etc/slim.conf添加default\_user = guoyong,并设置focus\_password = yes

  4. sudo又要密码了,这个和上一条都是etc-update 运行的后果,配置文件都被覆盖了,下次升级得注意避免。重新visudo设置不需要密码

     guoyong ALL=(ALL) NOPASSWD: ALL
    
  5. 进入Fluxbox后显示Wicd Network Manager窗口,修改.fluxbox/startup 给wicd-gtk添加-t选项

     wicd-gtk -t &
    
  6. 弃用ibus,改用fcitx

  7. 弃用conky

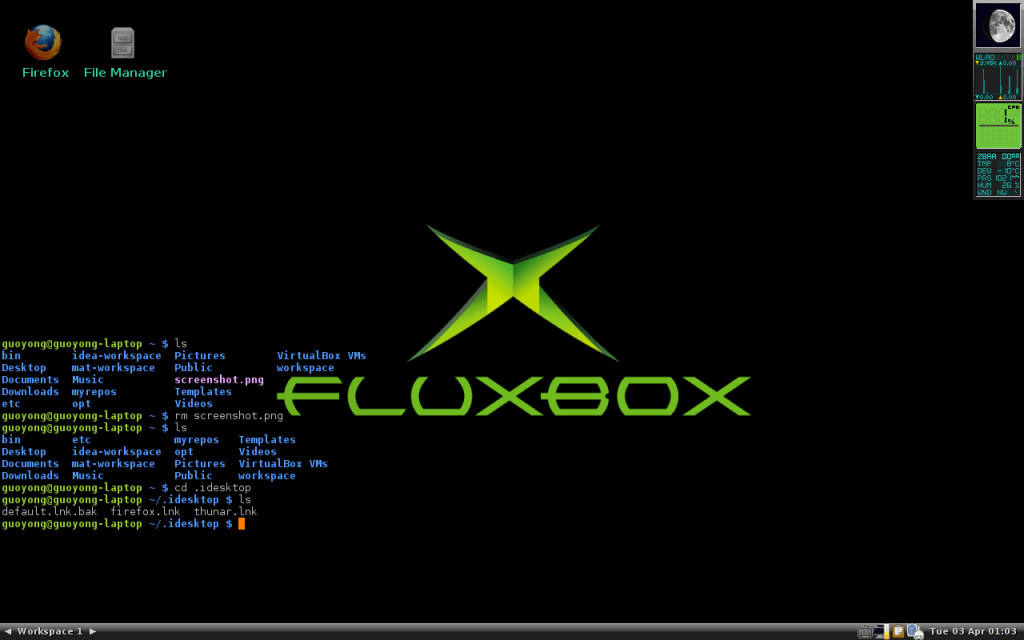
  8. 添加idesk和dockapps (wmMoonclock, wmcpuload, wmnd, wmweather)

  9. 无线网卡驱动需要编译新内核 kernel-3.2.12 ,同时加上了对fbsplash的支持

  10. fbsplash使用livedvd-12.0的主题,桌面壁纸找了一张Fluxbox的。
知道了关于Linux进程的一点事儿

昨天在乐维参与这两个问题的回答:

搜索过程中也解答了自己对Linux系统进程号一直以来存在的疑问,也加深了对僵尸进程和孤儿进程的理解。帮助别人的同时自己也有收获,这就是知识交流的好处,也是这种社交问答网站的价值所在吧。

关于进程号:

  • 32位系统的最大进程号是32,767,当到达32,768时系统会重新开始计数并从头寻找可用的值给新进程
  • 64位系统的最大进程号是 222 - 1 = 4,194,303
  • /proc/sys/kernel/pid_max 保存了这个上限。32位和64位系统的默认值都是32,768。

搜索到的两篇文章:

  • http://www.refining-linux.org/archives/7/Dr.-Frankenlinux-or-how-to-create-zombie-processes/
  • http://www.geekride.com/orphan-zombie-process/

RHEL5下编译MongoDB

很多人都说自己编译的稳定好用,我也来试试:

1. 参考官方文档,手工编译Spider Monkey
# curl -O ftp://ftp.mozilla.org/pub/mozilla.org/js/js-1.7.0.tar.gz
# tar zxvf js-1.7.0.tar.gz
# cd js/src
# export CFLAGS="-DJS_C_STRINGS_ARE_UTF8"
# make -f Makefile.ref
# JS_DIST=/usr make -f Makefile.ref export

2. 安装scons,用官网的rpm包就行。

3. 重新编译pcre。自带的编译时没带--enable-unicode-properties参数,mongdb启动时会提示:warning: some regex utf8 things will not work. pcre build doesn't have --enable-unicode-properties. RPMS包是在这里找到的。

# rpm -ivh pcre-6.6-2.el5_1.7.src.rpm
# vi /usr/src/redhat/SPECS/pcre.spec
%configure --enable-utf8
修改成
%configure --enable-utf8 --enable-unicode-properties
# rpmbuild -ba /usr/src/redhat/SPECS/pcre.spec
# rpm -Uvh /usr/src/redhat/RPMS/x86_64/pcre*.rpm

4. 安装1.41版本的boost库。这里可以找到编译好的boost库的RPM包。因为后面要编译成静态库,还需要安装boost141-static-1.41.0-2.el5.i386.rpm

5. 开始编译MongoDB

# cd mongodb-src-r1.8.1
# scons --libpath=/usr/lib64/boost141/ \
--cpppath=/usr/include/boost141/ \
--release --64 --static all

如果你没有--release和--static选项,可能会看见下面这样的消息
*** notice: no readline library, mongo shell will not have nice interactive line editing ***
解决方法是加上--extralib=ncurses。

6. 安装

# cd mongodb-src-r1.8.1
# scons --libpath=/usr/lib64/boost141/ \
--cpppath=/usr/include/boost141/ \
--release --64 --static --prefix=/opt/mongo-1.8.1 install

参考:
1. http://www.mongodb.org/display/DOCS/Building+for+Linux
2. http://hi.baidu.com/farmerluo/blog/item/37364623f35ba55e9922ed2f.html